How to replace bathroom faucet: DIY Step-by-Step and Professional Installation Tips
Hello! This guide will help you replace your bathroom faucet, whether you're looking to do it yourself or hire a professional. We will cover the different types of faucets and provide detailed installation instructions. Are you ready? Let's get started!
Last Updated: August 2025 | Estimated Reading Time: 12 Minutes
 This Article Will Answer For You:
- How to identify the type of faucet you need to replace?
- What tools and materials are needed to replace a faucet?
- How to safely remove the old faucet and install the new faucet?
- How do the replacement steps differ for different types of faucets (such as basin faucets, bathtub/shower faucets)?
- How to test and adjust the newly installed faucet to ensure there are no leaks?
Preparation: Safety First
Thorough preparation is essential before replacing a faucet. This not only ensures your safety but also makes the replacement process smoother. Here are the detailed preparation steps:
Essential Tools Checklist
Before starting the faucet replacement, please ensure you have the following tools on hand 4:
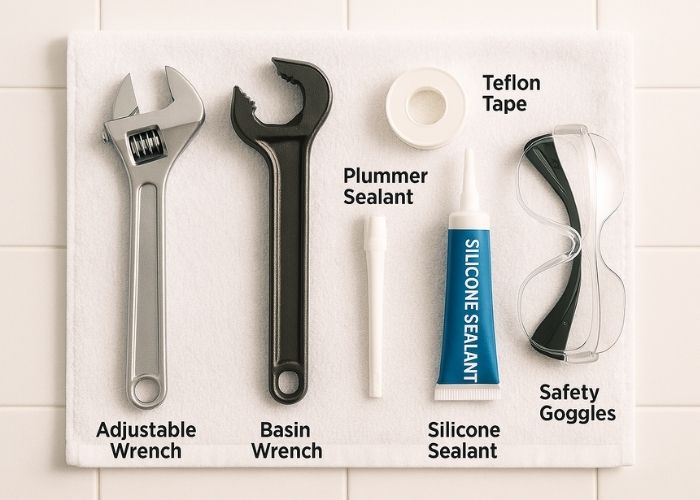
- Adjustable wrench (8-10 inches)
- Basin wrench (for tight spaces)
- Screwdrivers (flathead and Phillips)
- Teflon tape
- Silicone sealant
- Bucket (for residual water)
- Flashlight (improve visibility)
Safety Protocols
- Turn off the main water supply: This is the most important step to prevent flooding 4. Close the angle valves first.
- Cut off the power: For smart faucets, be sure to cut off the power supply.
- Drain residual water: Open the old faucet to drain the residual water in the pipes.
Practical Tip: Take pictures of the existing connections for reference 4. This can be very helpful when reconnecting.
Identify Faucet Type
Before you begin replacing, it is crucial to understand the type of faucet you are replacing 1. Bathroom faucets are mainly divided into the following categories 1:
- Basin Faucet: A faucet installed on a sink 1.
- Bathtub/Shower Faucet: A faucet installed on a bathtub or shower 1.
- Concealed Bathtub/Shower Faucet: A bathtub/shower faucet with the main body hidden in the wall 1.
- Bidet Faucet: A faucet used for bidets 1.
Depending on the number of mounting holes, basin faucets can be further subdivided into 2:
- Single-hole basin faucet 2: Suitable for modern designs, with low installation difficulty.
- 4-inch centerset basin faucet 2: Suitable for traditional bathrooms, with medium installation difficulty.
- Widespread basin faucet 2:
- Mini-widespread basin faucet 2:
- Wall-mounted basin faucet 2: Does not take up countertop space, suitable for wall-mounted sinks, with high installation difficulty.
Choose the basin faucet that suits your home for replacement.
Common Bathroom Faucet Types
| Type |
Hole Requirement |
Best For |
Difficulty |
| Single-hole |
1 hole |
Modern design |
★★☆☆☆ |
| 4" Centerset |
3 holes (4" apart) |
Traditional baths |
★★★☆☆ |
| Wall-mount |
No counter holes |
Wall-hung sinks |
★★★★☆ |
| Concealed |
Pre-plumbed |
Luxury hotels |
★★★★★ |
Exposed Faucet Replacement
The replacement of exposed faucets is relatively simple. Here are the detailed steps:
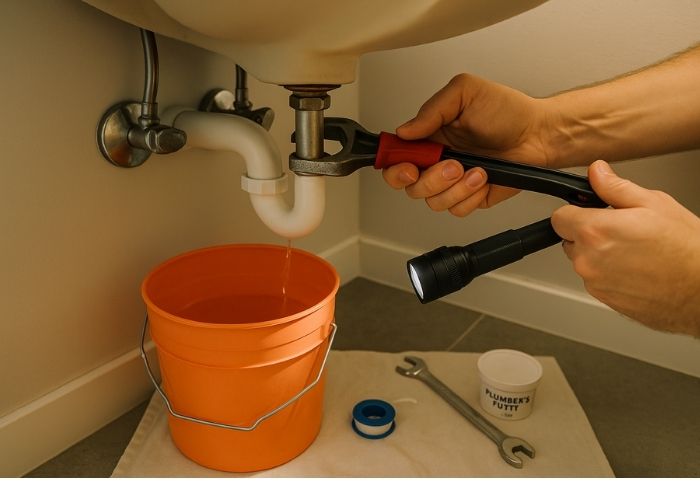
Removing the Old Faucet
- Surface protection: Protect the contact points with tape to prevent scratches.
- Disconnect supply lines: Turn counterclockwise to disconnect the supply lines 4. If the joints are stubborn, you can use WD-40 to loosen them 4.
- Remove mounting nuts: Use a basin wrench to remove the mounting nuts from below.
Installing the New Faucet
- Clean the surface: Remove old sealant.
- Sealing treatment:
- Wrap Teflon tape clockwise 3-5 times around the threads 4.
- Apply silicone at the base contact.
- Connection test:
- First, hand-tighten all connections.
- Finally, tighten another 1/4 turn with a wrench.
- Gradually test the water pressure.
Professional Tip: Avoid use for 24 hours while the silicone cures 4.
Concealed Faucet Key Points
The replacement of concealed faucets is more complicated and requires special attention to the following points:
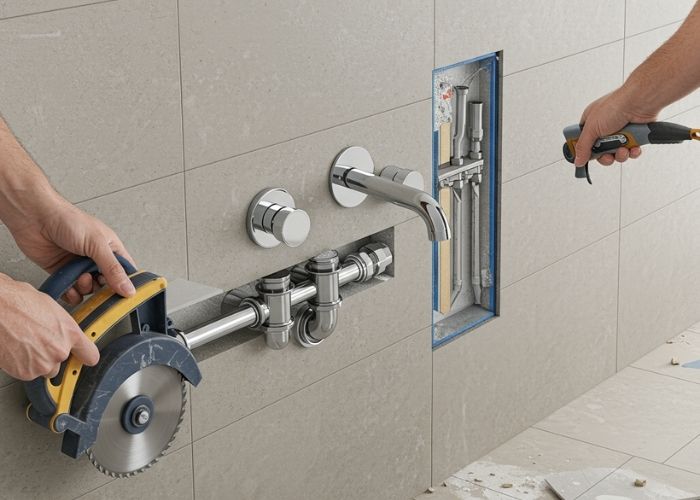
Special Considerations
- Wall treatment:
- Mark tile cutting lines.
- Use a professional tile cutter.
- Pressure test:
- Test at a pressure of 0.6MPa for 30 minutes.
- Inspect all solder joints.
- Restoration phase:
- Do a waterproof layer before tiling.
- Retain the access panel.
Smart Faucet Special Notes
Electrical Safety
- Must disconnect and verify power is off.
- Use waterproof junction boxes.
- Grounding test required.
Detailed Replacement Steps
Step 1: Identify Your Bathroom Faucet Type 1
Before starting, be sure to understand the type of faucet you are replacing 1. As mentioned earlier, bathroom faucets are mainly divided into basin faucets, bathtub/shower faucets, concealed bathtub/shower faucets, and bidet faucets 1.
Step 2: Preparation
- Tool Checklist: Make sure you have all the necessary tools ready 4.
- Safety Measures: Turn off the main water supply and protect the bathroom surfaces 4.
Step 3: Start Replacing 1
- Remove the Old Faucet:
- Place a bucket under the sink to collect any remaining water 1.
- Use an adjustable wrench or pipe wrench to loosen the water supply lines connected to the old faucet 1. Be careful, as water may drip out.
- Once all connections are disconnected, lift the old faucet from the sink or bathtub 1.
- Clean the Mounting Surface: Use a cleaner and rag to thoroughly clean the area on the sink or bathtub where the new faucet will be installed 1. Remove all old caulk or debris 1.
- Install the New Faucet:
- Install the new faucet according to the manufacturer's instructions 1. Typically, this involves inserting the faucet body into the hole, securing it from below with washers and nuts, and then connecting the water supply lines 1.
- Make sure all connections are secure, but do not overtighten, as this may damage the faucet or pipes 1.
Step 4: Replacement Guide for Different Faucet Types 1
- Basin Faucet Replacement: Depending on the number of mounting holes for the basin faucet, it can be further divided into single-hole basin faucets, 4-inch centerset basin faucets, widespread basin faucets, mini-widespread basin faucets, and wall-mounted basin faucets 2. Choose the basin faucet that suits your home for replacement 2.
- Bathtub/Shower Faucet Replacement:
- Exposed: Replacement is relatively simple, just unscrew the old faucet, clean the connection, wrap Teflon tape, and then install the new faucet 1.
- Concealed: Replacement is more complicated, requiring disassembly of the wall, replacement of the valve core, and reconnection of the pipes 1. If you are not familiar with the plumbing structure, it is recommended to have a professional do it 1.
Step 5: Test and Adjust 1
- Slowly turn on the main water supply and check all connections for leaks 1.
- If you find any leaks, tighten the connections or add more Teflon tape 1.
- Test the hot and cold water functions to make sure everything is working properly 1.
Troubleshooting Guide
| Symptom |
Likely Cause |
Solution |
| Base leakage |
Worn gasket |
Replace O-ring + silicone |
| Loose handle |
Loose screw |
Apply threadlocker |
| Temperature fluctuation |
Cartridge failure |
Replace ceramic cartridge 1 |
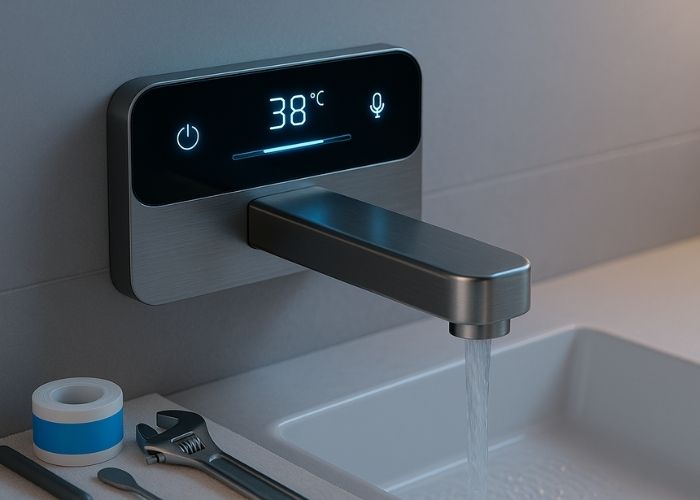
Latest Faucet Developments and Trends in 2025
In 2025, the faucet industry is undergoing a transformation driven by technological innovation and consumer demand. Smart faucets, especially those with touch controls and voice activation, are becoming increasingly popular. At the same time, sustainability and water-saving technologies are also gaining importance.
Latest Developments at a Glance
- Smart Technology: Smart faucets offer greater convenience and water management capabilities. For example, you can set water usage reminders or control water temperature and flow with voice commands 3.
- Sustainable Materials: More and more manufacturers are starting to use environmentally friendly materials, such as recycled metals and bio-based plastics, to reduce their environmental impact.
- Water-Saving Technology: New aerators and flow restrictor technologies can significantly reduce water consumption while maintaining good water flow performance.
Market Insights
Consumers are increasingly concerned about the durability, design, and functionality of faucets. Customization options, such as different surface treatments and interchangeable spray heads, are also becoming more common. In addition, buying faucets online is becoming a trend, as it offers a wider selection and more competitive prices.
Frequently Asked Questions
Question 1: How do I know if my faucet needs to be replaced?
If your faucet is leaking, rusty, has reduced water flow, or has difficulty regulating temperature, it may need to be replaced. In addition, if your faucet is outdated, replacing it with a more efficient model can save water and energy.
Question 2: How long does it take to replace a faucet?
For someone with some DIY experience, replacing an exposed faucet usually takes 1-2 hours. However, replacing a concealed faucet may take longer and it is recommended to have a professional do it.
Question 3: How do I choose the right faucet for my bathroom?
When choosing a faucet, consider your bathroom style, the number and size of holes in your sink, and your budget. Also, pay attention to the quality and durability of the faucet, and choosing a well-known brand can ensure you get better after-sales service.
Question 4: What safety precautions should I take when replacing a faucet?
Be sure to turn off the main water supply to prevent flooding. For smart faucets, disconnect the power and ensure that all electrical connections meet safety standards.
Summary and Recommendations
Replacing a bathroom faucet is a project that can significantly improve the look and function of your bathroom. By following the steps in this guide, you can complete the replacement yourself or hire a professional to ensure the job is done smoothly. Remember, safety first, choose a faucet that fits your needs and budget, and enjoy the convenience and comfort of your new faucet.
Action Recommendations
- DIY Enthusiasts: If you are confident, you can try replacing an exposed faucet. Please read this guide carefully and prepare all the necessary tools and materials.
- Seek Professional Help: If you are not familiar with plumbing work, or need to replace a concealed faucet, be sure to hire a qualified professional.
- Choose High-Quality Faucets: Choose faucets from well-known brands to ensure their quality and durability.
Recommended Internal Links:
- Learn more about basin faucet selection tips, please refer to our "Basin Faucet Buying Guide"
- Learn more about faucet installation steps, please refer to our "Faucet Installation Detailed Tutorial"
- Learn more about the advantages of smart faucets, please refer to our "Smart Faucet: A New Choice for the Future Home"
Recommended External Links:
- Learn more about faucet standards, please refer to the American Society of Plumbing Engineers (ASPE)
- Learn more about faucet materials, please refer to Wikipedia
- Learn more about faucet brands, please refer to Kingston Brass 14
 This Article Will Answer For You:


